Besides having no noticeable and
immediate environmental impact, stoves are much more
convenient to cook on than an open fire. They produce
instantaneous heat, are not dependent on dry wood for
fuel, and don't blacken pots or make your food taste
smoky.
There are oodles of stoves available
and even more in which one can make on their own without
much difficulty. The most popular however are commercially
made canister models, followed by liquid fueled. Canister
stoves are powered by cans of pre-pressurized fuel whereas
liquid fueled types rely on the user to pour fuel in
to a bottle and physically pressurize it. Both have
their advantages and disadvantages.
Canister stoves
These stoves are the most popular and for good reason.
There is no fuel to spill, they simmer well, there's
no priming or pumping, they're light and compact, and
they are extremely easy to use. Once the fuel canister
is screwed on...just turn the knob, light, and start
cooking. This takes about 15 seconds. Practically idiot
proof!
The disadvantages are modest. Performance wise, compared
to liquid fueled, they have a bit lower heat output
and are slightly less fuel-efficient than liquid fueled
stoves...as a general rule. The fuel also costs slightly
more and the canisters can not be reused.
The most popular canister stoves are the Snow
Peak Giga Power and LiteMax, MSR
Pocket Rocket, and Jetboil.
The LiteMax is sinfully light and compact. Not far behind
is the Pocket Rocket and Giga Power. The Jetboil isn't
terribly light or compact but it is certainly efficient
and slick.
Liquid fueled stoves
The advantages here are lower fuel costs, high heat
output, and better performance in cold weather. Another
advantage is that some can be used with varying fuels.
If traveling abroad in questionable territory, these
multi-fuel stoves are the logical choice.
The disadvantages are pumping, priming, tricky simmering,
and the mess created by spilled fuel. These stoves are
also bulkier and on average, three to five times heavier
than canister stoves. In that latter aspect, some don't
fare well on long trips compared to other styles. Click
here
for comparisons.
In need of a multi-fuel
liquid stove? MSR
has had the market by the horns. Take your pick from
the classic Whisperlite International to the award winning
DragonFly and others.
WARNING:
When using any kind of liquid fuel stove, be sure
to double or triple zip lock the fuel bottle and pack
as far away from the food as possible. Even with no
physical leakage, the fumes can permeate into and
ruin your food supply. Yes, on one otherwise beautiful
evening, we watched fig newtons and various other
contaminated food go “poof” in the campfire.
 |
Even
the slightest of breezes can be detrimental to
a stoves performance. To prevent unnecessary fuel
consumption, use a windscreen. A closed cell foam
sleeping mat makes one like no other. I hope it's
obvious what can happen if measures aren't taken
to hold it in place.... |
Alternative
stoves
 |
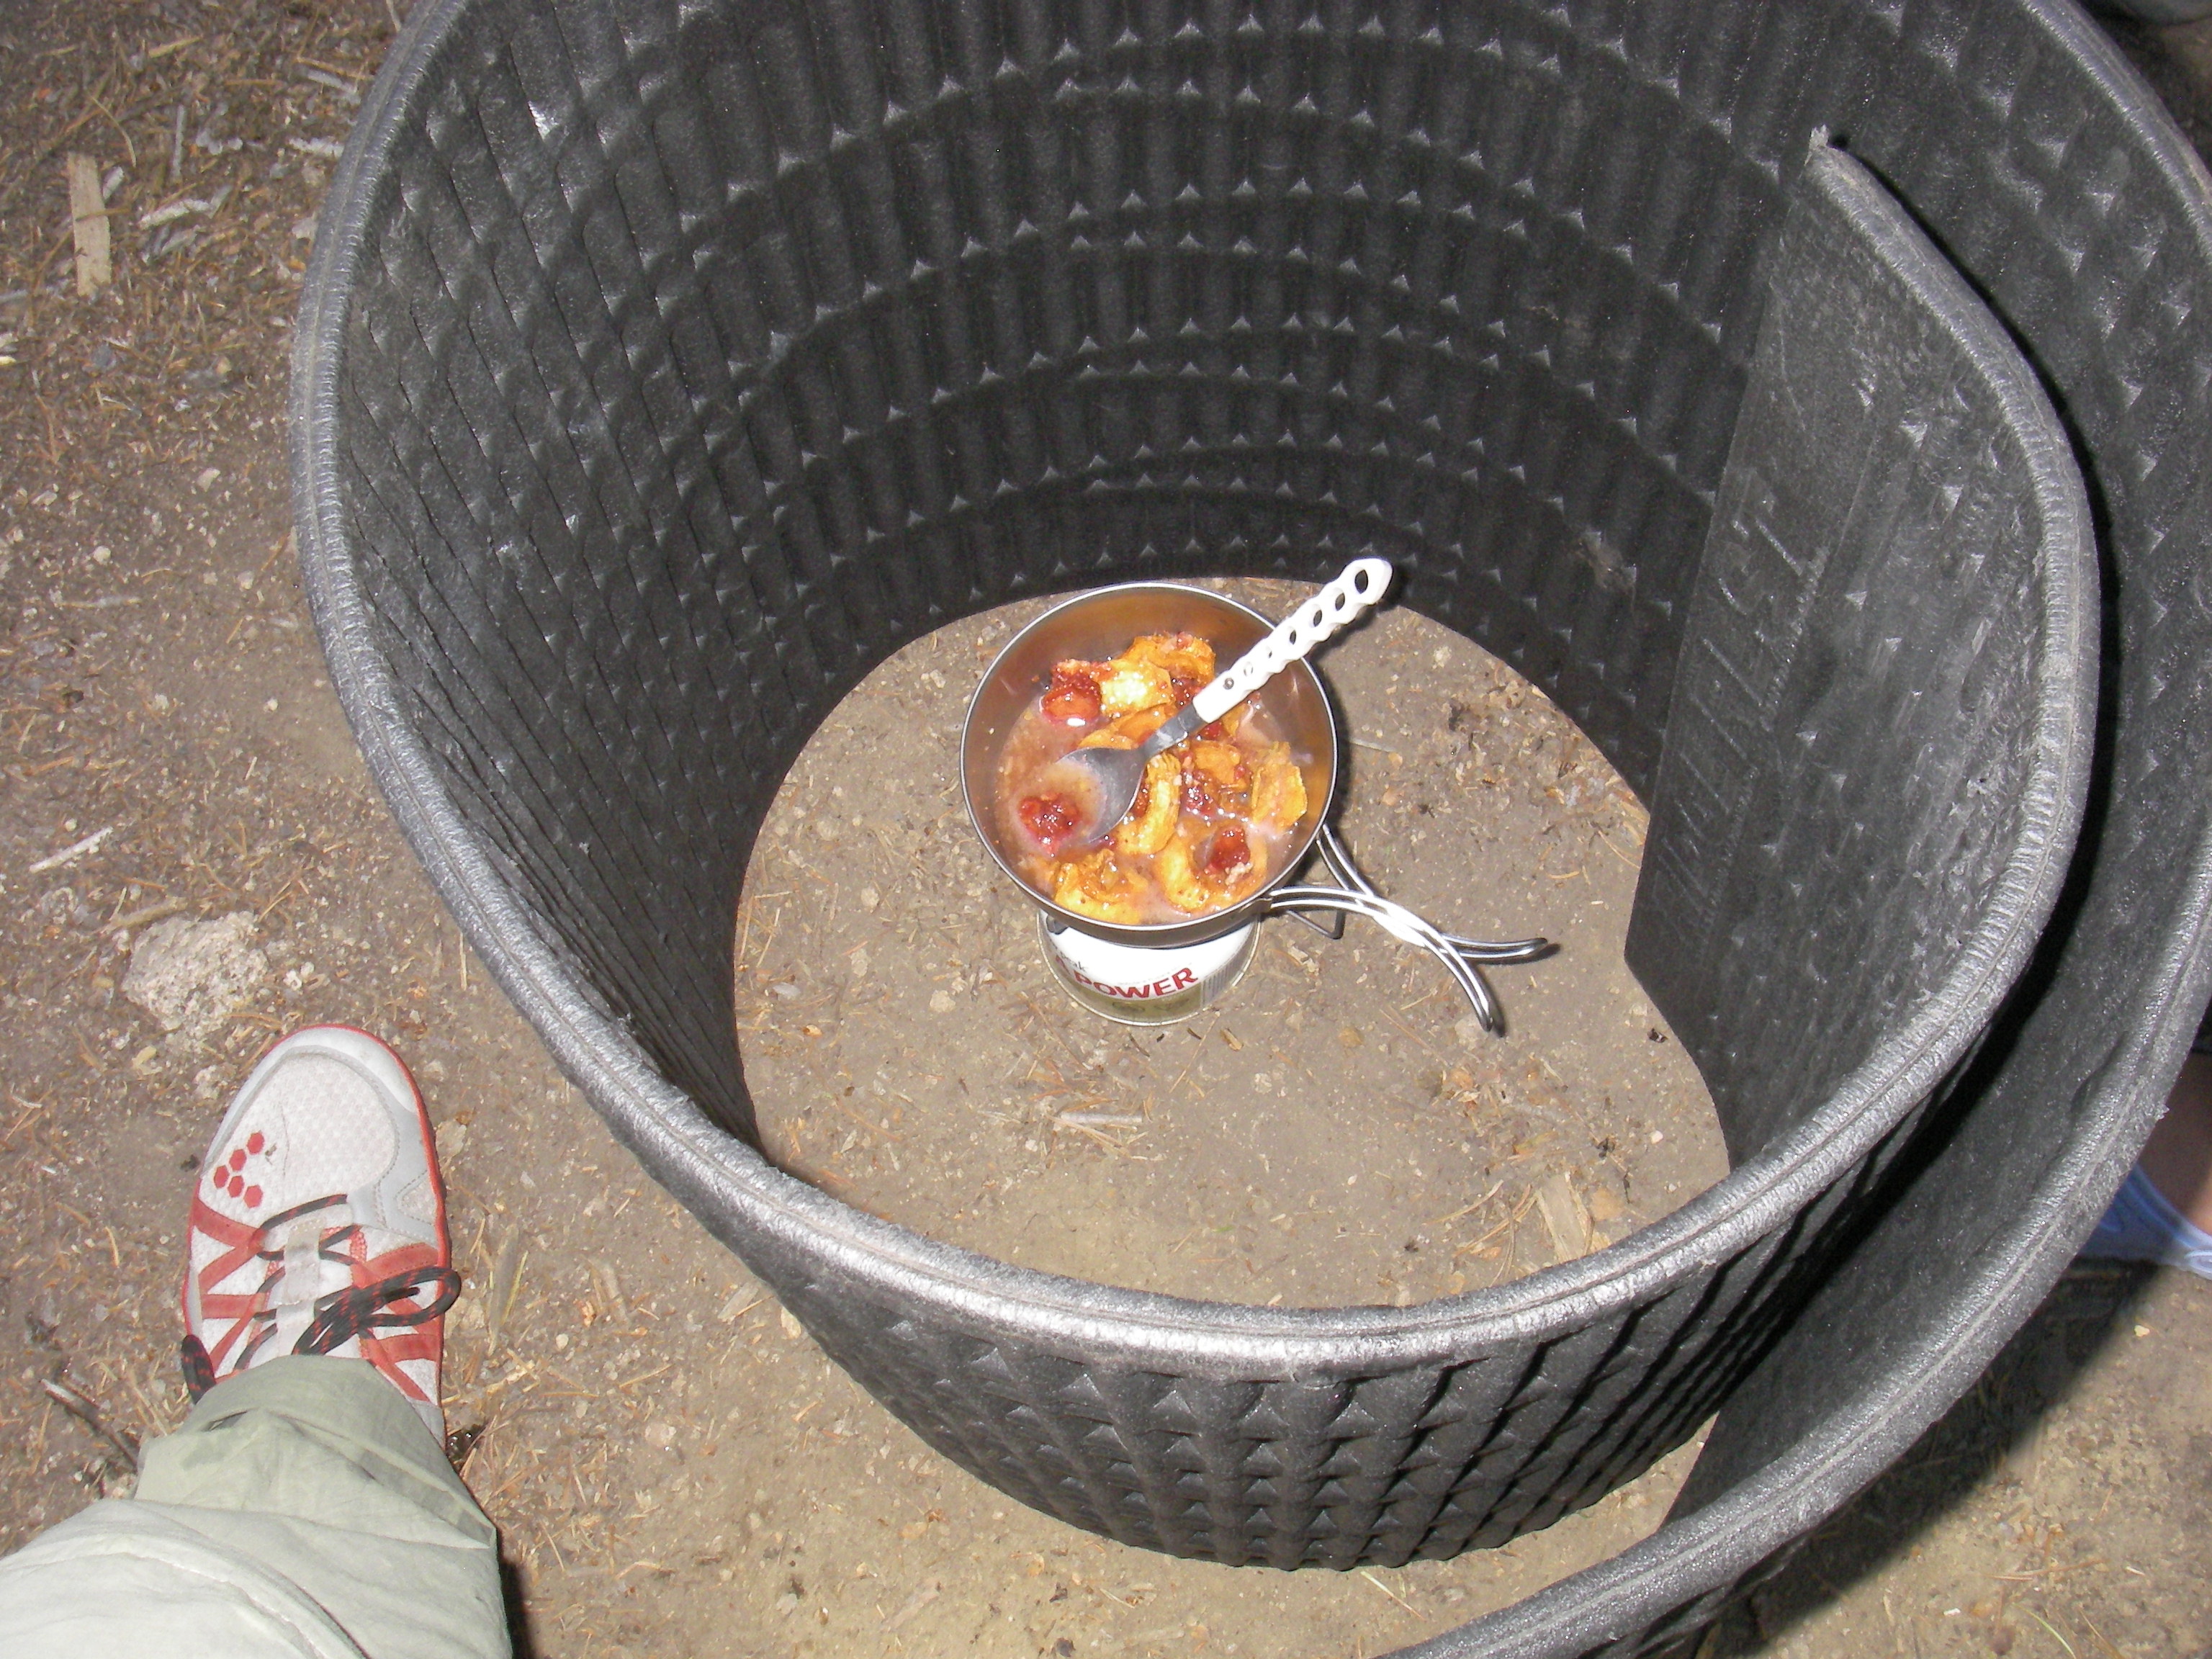
Here's my
homemade Super
Cat alcohol stove & fuel of choice. In
controlled testing conditions, using a Vargo BOT
700 pot & lid, this stove boils 2 cups of
water in 4.5 minutes with 1 ounce of 190 proof.
Total burn time is 6.5 minutes. In the
field, with homemade cone wind screen,
it boils in ~5.5 minutes with a burn time of ~7.25
minutes. Weighs 1/4 ounce, took 10 minutes to
make & cost .79 cents. In the background is
my 4 fluid oz fuel bottle (Listerine "sample").
Tip: To keep even the thirstiest
of boozers out of your fuel, drop your bottoms
at camp & let them see the open bottle touch
your naked behind.
Specs:
3 oz alum cat food can with 15 holes in top &
10 bottom. How to: Print then
tape Super Cat Zen
template to can; use push pin to make pilot
holes then drill out with 3/16" bit (can
be done w/ fingers). Load with fuel to bottom
of holes, light, let it warm up for ~20 seconds,
carefully place pot on top, & cook! |
There are multitudes of wood, tablet
and alcohol stoves that can either be purchased commercially
or made at home with minimal effort. These stoves vary
from being nearly worthless to quite impressive.
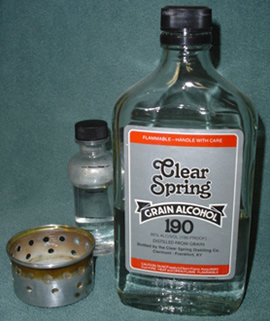
Perhaps the most popular of these
obscure stoves is the home made alcohol stove. They
can be incredibly simple, surprisingly effective and
weigh as little as a few grams. Furthermore, they can
be made for free, sometimes in a matter of minutes and
will burn potable Grain Alcohol such as 190 proof Everclear
or Clear Spring (150 doesn't work very
well). Of course, these stoves will also burn
the less expensive alcohols such as Isopropyl, Denatured,
and Methyl. The downside to these less pricey fuels
are the various toxic chemicals they contain. "Klean-Strip
Green" is a less toxic denatured alcohol but still
contains poisonous chemicals.
The downside to these stoves is
that they are not powerful enough for boiling large
amounts of water. They work best for simple meals requiring
no more than 2 cups of water at a time and for one or
two people on shorter trips. To squeeze the most from
these little stoves, the use of a windscreen and pot
lid is crucial. Aluminum foil is very light and inexpensive.
An aluminum pie plate or turkey roasting pan can also
be converted. For something that's only a few grams
heavier yet more durable and easier to stow, a very
nice windscreen can be made from aluminum flashing.
Interested in making an alcohol
stove? You're in luck as making these fun little units
has become an obsessive hobby for some. As such, these
"stovies" have shared considerable information
on the Net. For those not wanting to wade through the
expanse of it all, the below links will satisfy all
but the most curious do-it-yourselfers.
http://zenstoves.net/
http://jwbasecamp.com/Articles/SuperCat/index.html
For those who would prefer to
buy rather than experiment with making their own, there
are a number of folks selling these type of stoves and
complete packages. They are surprisingly inexpensive
with much of the guess work taken out through testing
for optimization of components (wind screens/pots/stoves).
http://www.flatcatgear.com/
http://www.woodgaz-stove.com/
https://www.minibulldesign.com/ProductCart/pc/home.asp
http://www.packafeather.com/
https://www.traildesigns.com/
Another stove of interest is the
home made wood stove made from a coffee can. I find
them appealing because like the home made alcohol stoves,
these can be made for free by anyone with materials
that are normally discarded. While these wouldn’t
be the most convenient stoves to use, they would be
the lightest for long trips as one does not have to
carry fuel. They instead rely on small twigs, which
unlike larger wood for campfires, are easy to find under
most trees…dry...even after rain. Despite the
inconveniences of gathering fuel, tending the fire,
and the blackened pot, I think it would be fun to experiment
with one of these.
Like alcohol stoves, there are
many different wood stove styles. Here are but a few:
http://zenstoves.net/Wood.htm
http://www.backpacking.net/makegear/falk-woodstove/index.html
http://www.jwbasecamp.com/Articles/Fire-Bucket/index.html
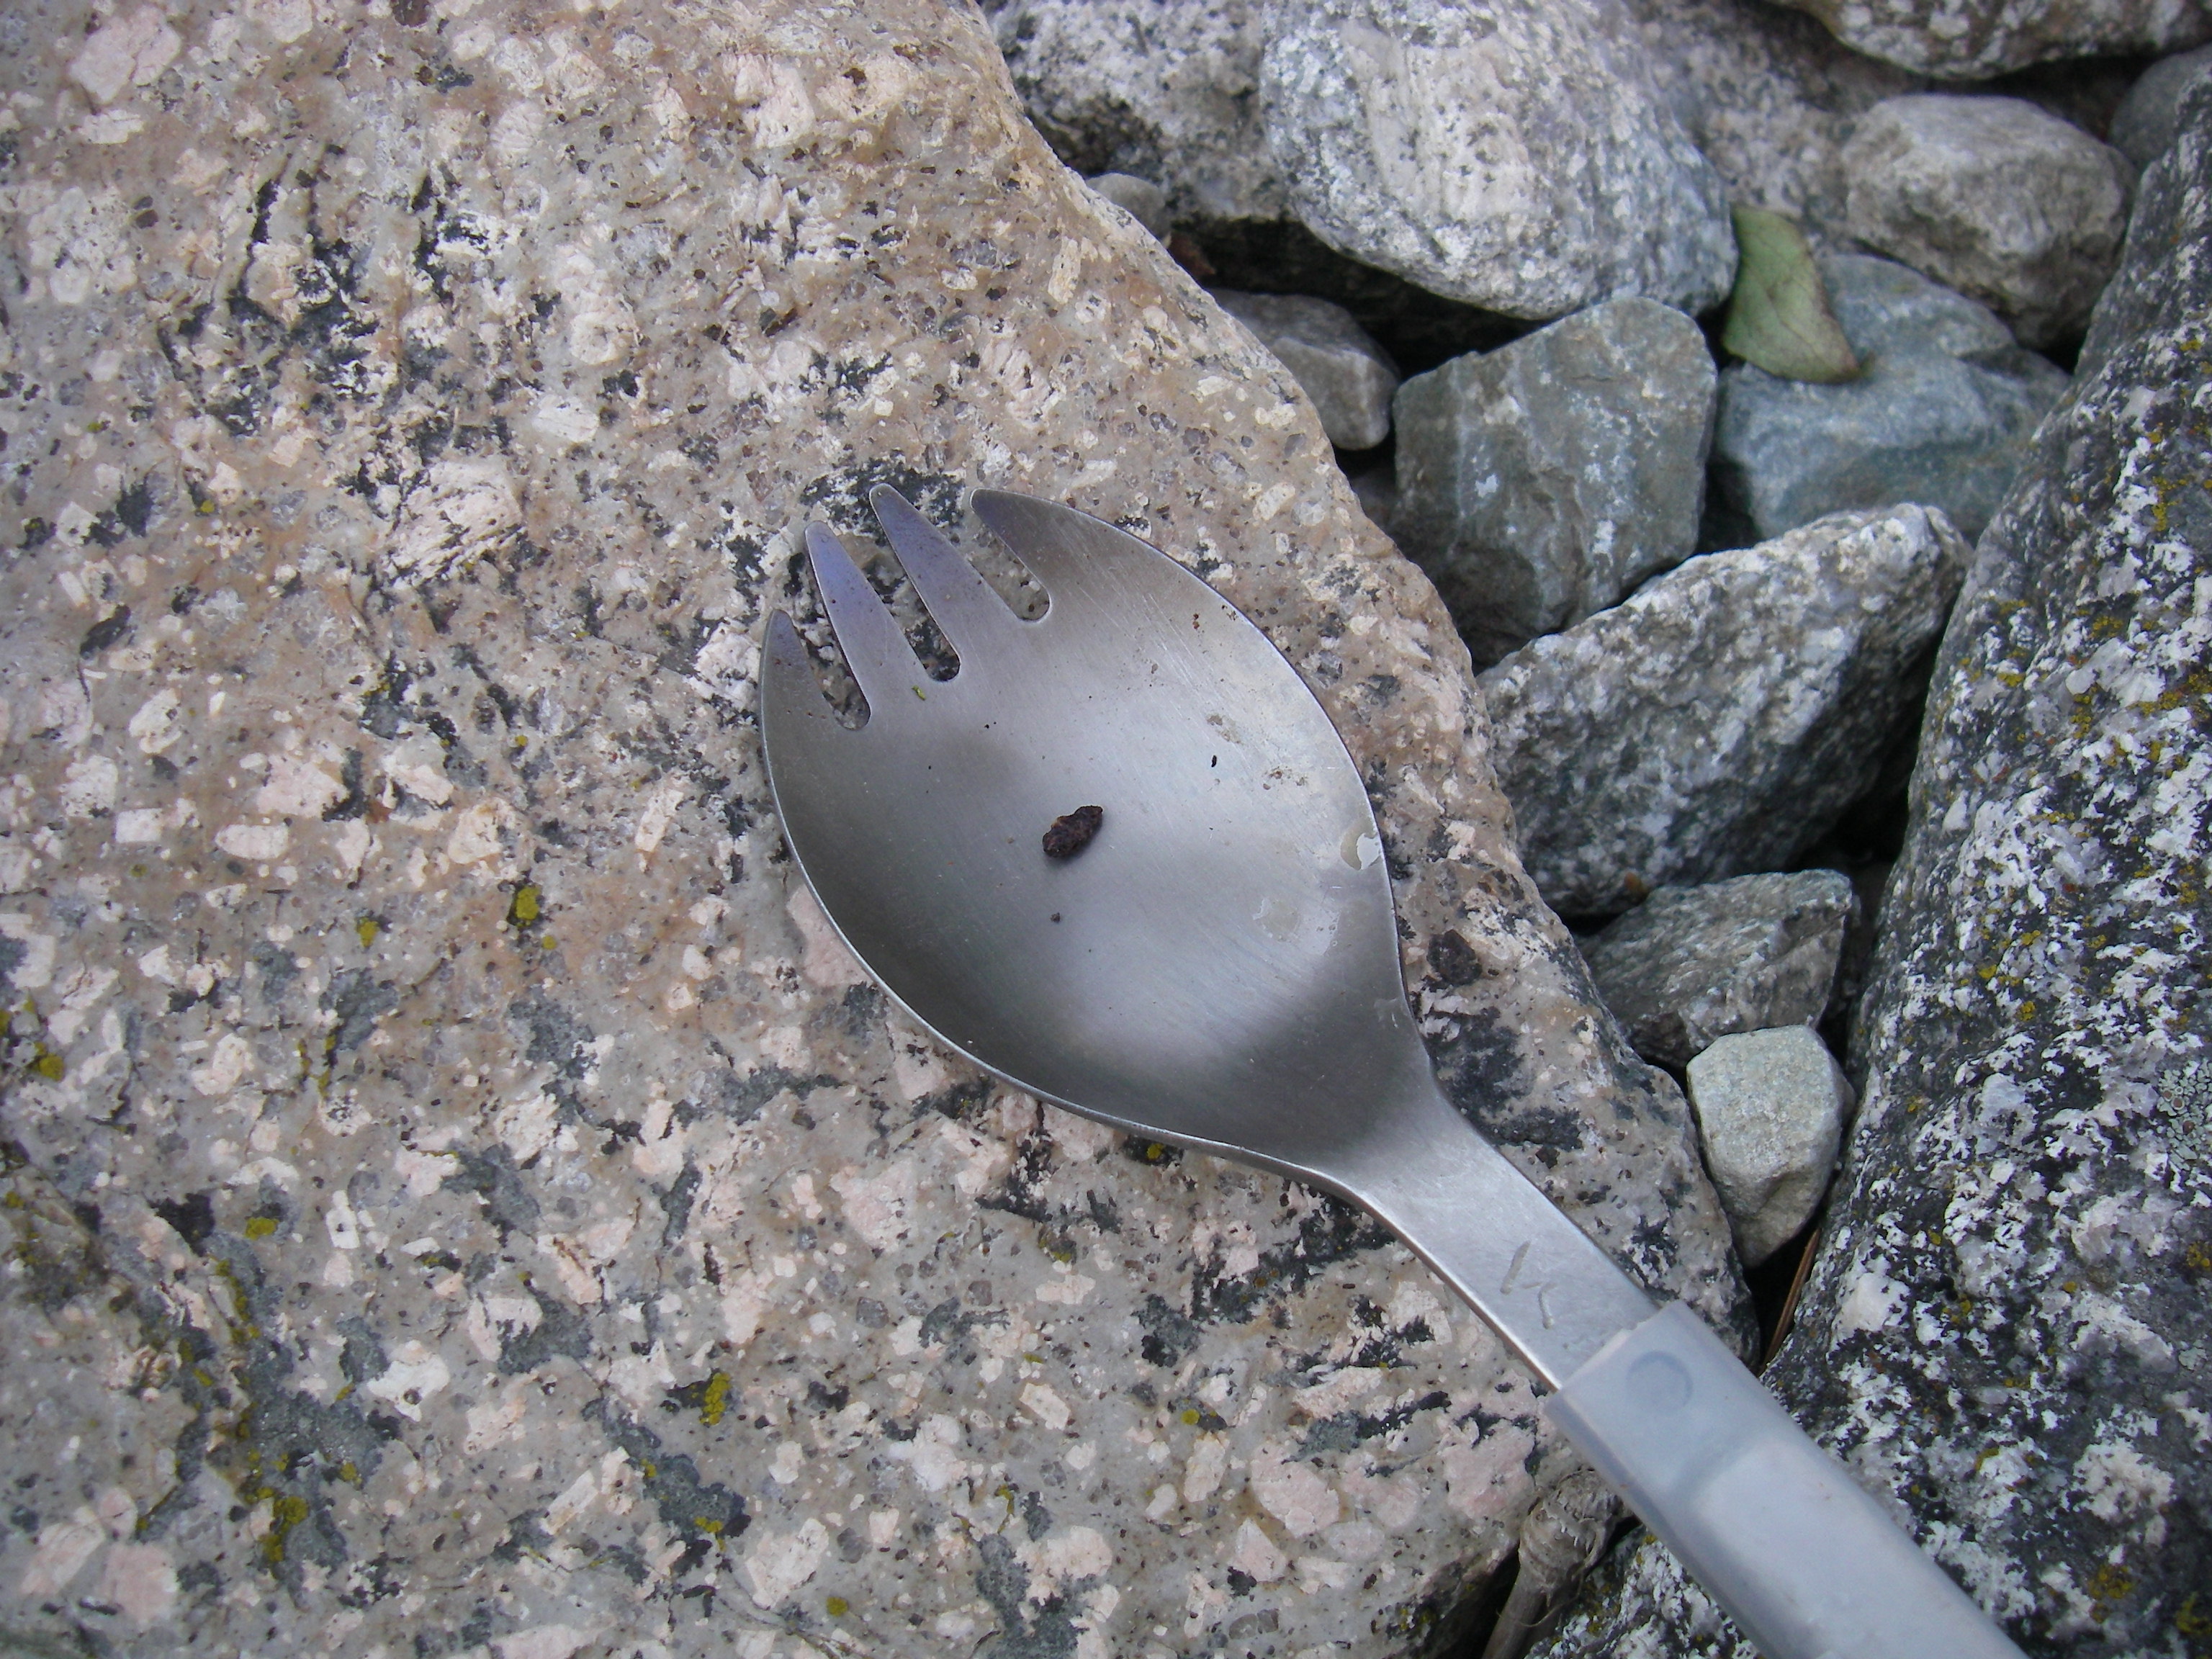
Utensils
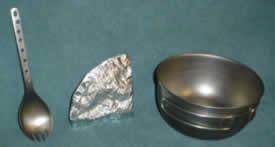 |
| Titanium spork,
aluminum foil lid, & titanium pot. Very simple,
compact & light at 2.5 oz. Note the holes in
the spork handle. Am I nutty enough to drill those
for weight reduction? Absolutely! But, those holes
also serve another purpose: cooling. If the spork
is left in the food being cooked, the handle will
conduct heat. Hot handle = burned fingers. Holes
= air flow = happy fingers. |
 |
|
Though just
a touch heavier than the pot in the top pic, this
is another option that I've come to prefer: A
Vargo BOT 700 titanium pot with screw on lid.
This makes for a much tidier set-up. The lid is
also easier to clean than wrinkled foil. Lastly,
the BOT works great as a mug & can even be
used as a water bottle if need be.
Everything in
the pic easily fits inside the BOT: Stove, fuel,
lighter, fold-away spoon, headlamp, flossers,
toothbrush, and baking soda. I added silicone
tubing to the handles to protect my fingers from
the heat.
|
With all that is available, it’s
easy to get carried away with cups, pots, pans, plates,
untensils, and all the various other gizmos. However,
a spork and a single pot with lid is perfectly adequate
(careful with pot selection. If the
lid overhangs the pot, it can catch some of the fire's
emissions & make your food taste funny).
A metal spoon or spork is nice as
it can be passed over a flame to disinfect. Bamboo is
lighter and has a feel many find to be more comfortable
in hand and mouth. For the pot…anything that’s
metal works. I have even seen people use large cans
with wire handles. The square bottoms aren’t the
most efficient in terms of boil time nor are they as
easy to clean as a rounded bottom. But, due to the fact
they are free and weigh little, cans are attractive.
One should be warned though.
The downside to using cans is the interior coating,
or more specifically, the chemicals used in these coatings,
namely, at this time, BPA. BPA leaches in to what ever
liquidity substance comes in contact with it. Heat intensifies
the leaching and in the case of boiling water or cooking
food, you may ingest very high concentrations. The levels
of BPA in the lining will likely decline after a certain
amount of use. However, to
my knowledge, there has been no scientific studies showing
the extent of this.
For these reasons, I would recommend
against the use of a can for a cook pot. Remember too
that there may be other chemicals besides BPA that could
leach out of a can's lining. BPA is currently the one
receiving the most attention in the scientific and legislative
worlds. To learn more about BPA, click here.
If you do need new a new pot, and
are on a mission to save every bit of weight possible,
take a look Snow
Peak. They offer one of the largest and lightest
selection of titanium cookware out there. Their prices
are very competitive as well.
Additional ideas:
- wrap the spork and all other
pointy objects in a pair of socks or other clothing
to protect your drybags from punctures. Alternatively,
you can store a folding spork or spoon inside your
cooking pot.
- should you need a knife, use
the one on your pfd
- instead of a cup, drink from
your water bottle
- if you like hot beverages,
consider a multi-purpose metal water bottle like
this or drink
from the pan or use a taller and norrower mug-like
pot
- use your pan as a bowl or eat
from the freeze-dried packet
|
A
rodent's payback for camping in his spot? Never
leave your spork out overnight! . |
Toiletries
& miscellaneous
These things weigh little, take up a minute amount of
space and will generally make life a little more pleasant.
The following is what I take:
- small vial of baking soda for
toothpaste
- toothbrush (w/
half the handle cut off & the remainder filled
w/ holes)
- dental flosser/pick
- roll of toilet paper with cardboard
insert removed
- towel...if there are hot springs
 |
| Tired
of looking for your headlamp in the middle of
the night? Wear it around your neck & you'll
never forget where you left it.....hopefully.
Here's a headlamp necklace made from a $10 keychain
light. The band is simply a piece of 1/16"
bungee cord. Pull it up around the head &
you're ready to go. Inexpensive, simple, light
weight & functional. |
- lighter
- mini headlamp
I put the toothpaste, toothbrush,
and flosser in my cook pot along with the stove fuel.
I generally carry the lighter and headlamp in my cook
pot as well... though it is a good idea to carry the
headlamp in your PFD pocket with a second lighter in
case you lose your boat and have to spend the night
out. The towel and roll of toilet paper goes in the
lunch sack where it is easily accessible.
I don't take soap or scrub pads.
Besides not being cordial to the environment, soap isn’t
a must and creates unnecessary weight and bulk. This
doesn’t mean you have to eat out of dirty pans
and smell like a pig. Wet sand is as effective as anything
to wash utensils (a small rock rubbing
sand against the pan removes stubbornly stuck food)
and if you're compelled, your body can be washed off
in the river or, in hot springs if you are lucky enough
to have them. If you like the idea of a towel, look
at the Cascade Designs PackTowl. They are so absorbent,
the 1 ½ ounce small version is adequate for effectively
drying the entire body.
|